PREPARING THE PORCELAIN LAMINATE AND APPLICATION TO THE TEETH
in General, Porcelain Laminate
In this article, we will explain the steps your dentist will follow during porcelain laminate application. This process, which is usually carried out in 2 appointments, can be applied to a single tooth or more than one tooth at the same time. The gap between two appointments is usually 2 weeks.
STEP 1: ABRATING THE TOOTH SURFACE
The purpose of this process is to erase the enamel layer on the front of the tooth at the thickness of the dental laminate to be placed. Thus, after the dental laminate is attached to the tooth, there is no significant increase in the thickness of the tooth.
WHAT IS THE THICKNESS OF DENTAL MINE TO BE ABRASED?
The amount to be abraded from tooth enamel can be as thin as 0.5-0.7 mm, although it varies from case to case. This is only twice the thickness of an eggshell.
BASE NEEDS MORE ABRASION
In some cases, your dentist may require more abrasion (around 1.5 mm) of your tooth enamel. Your dentist will consider the following two issues when making this decision:
With more abrasion, it becomes possible to place a thicker dental laminate. The thicker dental laminate makes it easier to create an aesthetic and natural appearance while covering the color of the underlying tooth.
On the other hand, excessive etching of tooth enamel may expose some of the dentin layer (the hard tissue under the enamel). This situation can adversely affect the life of the dental laminate.
IS ANESTHESIA REQUIRED?
Some teeth and dental tissues are naturally sensitive to the coldness of the tools your dentist will use during the procedure. In addition, if the ends of the dental laminate will extend below the gingival line, the procedures to be performed on these tissues may cause sensitivity.
STEP 2: SELECTING THE COLOR TONE
Your dentist decides which color of porcelain will be appropriate by determining the color tone of the teeth on both sides of your tooth to be covered with dental laminate.
Your dentist may decide to use different color tones of porcelains in different parts of the dental laminate. Your dentist will also determine how transparent the different parts of the dental laminate should be.
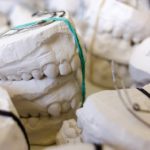
STEP 3: MEASURE
When the abrating process is completed, your dentist takes measurements and creates the mold, that is, the model of your teeth and gums. Your dental laminate will be prepared using this model.
Option One: Most dentists use a special silicone to prepare the model.
Suitable for sensitive work, this silicone is an adhesive material that is placed on the teeth after being filled into a special container. After waiting for a few minutes, the silicone is removed from the mouth. The model obtained from this extracted silicone is then sent to the dental laboratory and used in the production of porcelain laminate. This process, whose length depends on the adjustments made, takes 2 weeks on average.
Placing a Special Floss
Your dentist can wear your teeth so that the edge of the dental laminate is under your gum. In this case, before removing the model of your mouth, a special floss may be placed in the space between your tooth and gum.
This special floss removes the gum from the tooth.
Your dentist removes the floss just before placing the mold in your mouth.
The purpose of this is to ensure that there is a gap between your tooth and gingiva while taking the measurement.
Thus, the molding material can settle in the space between your tooth and your gingiva and take the shape of this part.
Second Option: Your dentist can have a machine that produces dental laminate in a shorter time than a synthetic porcelain block.
The advantage of this method is that the abration of the tooth and the bonding of the dental laminate can be completed in a single appointment.
On the other hand, your dentist may not prefer to use this machine. Because;
Dental laminates processed with this machine are produced from a single colored ceramic block.
Dental laminates made by laboratory technicians are carefully prepared to create a natural tooth image. In this method, porcelains of different colors and transparency can be used together in accordance with the characteristics of the teeth adjacent to the tooth where the coating will be placed.
STEP 4: TEMPORARY LAMINATES
It usually takes 1-2 weeks for dental laminates to be produced in the dental laboratory. For this waiting period, your dentist will adhere temporary laminate to your teeth on which abrasion is applied.
In cases where the amount of etching is too low, temporary laminate may not be used. However, in this case;
Your tooth looks a little strange when looked closely.
You may experience increased sensitivity to hot and cold foods / beverages, as a certain part is removed from the surface of your tooth.
The surface of your tooth can be harder on your tongue and lips than it used to be.
Temporary laminate application is more important when the abraded tooth enamel thickness is large. Otherwise, the appearance of your teeth may become visibly strange and sensitivity to heat / cold may become a serious problem.
Dentists often use a plastic-like material to create temporary laminates or a composite filling used to make a white filling. The temporary coating should be strong enough to stay in place for as long as it is required, but at the same time it can be easily separated from the tooth at the next appointment.
STEP 5: EVALUATION BEFORE BONDING
Your dentist will remove your temporary laminates from your tooth to place your permanent laminate. Temporary laminates are usually not bonded to the tooth or are adhered very poorly. Removing the temporary laminate is a very simple process. Your dentist abrades the temporary laminate halfway down and breaks it apart from your tooth.
-
A) CHECKING LAMINATE’S COMPLIANCE
Before the bonding process, your dentist first checks the suitability of your laminate to your teeth. For this;
It is placed on the laminate tooth and its compliance is examined.
The laminate is removed, etched and repositioned repeatedly until the fit is perfect. (Generally, anesthesia is not required at this stage and later stages.)
-
B) CHECKING THE SHAPE OF LAMINATE
Although the laboratory that prepares the laminate works to achieve the ideal result, you will review the laminate with your dentist. At this stage, if you are not satisfied with the result, your dentist will make changes such as shortening or rounding the corners of the laminate.
The purpose of this step is to perfect the shape of the dental laminate. On the other hand, the necessary changes can be made after the laminate is attached to your tooth. So have peace of mind.
-
C) MAKING LAMINATE’S COLOR EVALUATION
Your dentist determines the color tone of the porcelain to be used for your dental laminate by considering the color tones of neighboring teeth. However, because dental laminate is translucent, your dentist can perfect the shade during bonding by using an appropriate shade of bonding material. Your dentist first uses a trial paste that is the same color as the glue that he or she decides is the appropriate shade. Trial pastes are the same colors as bonding materials, but lack adhesive properties.
Your dentist places the dental laminate over the trial paste and reviews the color. If she/he does not find it suitable, she/he repeats the process with different colored test pastes and decides on the adhesive material that will provide the most appropriate color.
Remember, this stage is your last chance to challenge the color of your new laminates. After your dental laminate is attached to its place, it is not possible to change color.
STEP 6: BONDING THE PORCELAIN LAMINATE
After the arrangements regarding the color and shape of the coating are finished, the bonding process begins. Your dentist first cleans the trial paste. Then it cleans the inner surface of your dental laminate and makes it ready for the bonding process. Finally, it cleans and prepares the tooth surface where the laminate will be attached.
ACID JEL APPLICATION
Your dentist will apply an acidic gel to the surface of your tooth and wait 15-20 seconds. This process creates a very rough tooth enamel surface. Thus, the surface of your tooth becomes ready for the porcelain laminate to be adhered. (A similar procedure is applied to the inner surface of the dental laminate in the dental laboratory.)
ADHESIVE
After your dentist cleans the acidic gel and dries the tooth surface, she/he applies a transparent substance on your tooth. This substance provides adhesion with the tooth surface. Then, the adhesive selected to provide the appropriate color tone is applied to the inner surface of the porcelain laminate and placed on the laminate tooth. When the laminate takes the proper position, your dentist directs a blue light on your tooth. This light activates the adhesives used, allowing the dental laminate to adhere to your teeth in less than a minute.
STEP 7: FINAL TOUCHES
Your dentist will remove the adhesive material residue from your teeth. Then makes adjustments to the lines of your dental laminate if necessary. Finally, your dentist examines how your upper and lower teeth touch each other when you close your mouth. The purpose of this step is to make sure that dental laminate application does not change the way your mouth closes.
MEASURES
The light your dentist directs to your tooth ensures that the dental laminate is ready for immediate use. However, it is useful to be a little careful in the beginning.
The way your mouth closes after the procedure may seem a little strange to you. Possible reasons for this:
Small changes in the shape of the tooth
If anesthesia was applied during the procedure, the effect of this continues
A temporary stiffness in your jaw due to the fact that your mouth is open for a while during the bonding of the dental laminate.
After a while, you will get used to your dental laminate. If you notice a flaw or oddity, act with caution and tell your dentist about it.
Your dentist can give you a special bite plaque (night plaque) to use while you sleep to protect your dental laminate. Porcelain laminates can break when subjected to the great forces that arise during actions such as clenching or grinding. Since you cannot control them while you sleep, if you have such a problem, you can protect your dental laminate from damage by using this special plate at night.
STEP 8: CHECK-UP APPOINTMENT
Dentists usually ask you to come for a check-up approximately one week after the bonding procedure. During this appointment, your dentist examines how your gums are affected by the presence of dental laminate and if you have complaints about the shape of the laminate, he will make the necessary arrangements.
Some people experience sensitivity to heat and cold after dental laminate application. This problem usually resolves as the time passes. But if you have such a complaint, still tell your dentist about it. Your dentist can speed up the resolution of the problem.
DENTAL LAMINATE APPLICATION IN A SINGLE APPOINTMENT
Dentists with the necessary equipment can prepare the dental laminate and stick it to your teeth in one appointment. However, laminates used in this method are prepared from a single colored ceramic block. This causes the laminate to look unnatural.